ProtoDock - Acrylic dock for Raspberry Pi 3B/4B - PiHut TPH-041
Бестселлер
- Артикул:
- 42763662
-5%
12 212 AMD
Старая цена
Характеристики
- Корпус - модуль
- Pi 4B/3B+/3B/2B
- Случай - Доступ к GPIO
- yes
Производительность
- Тип
- Крпус для микрокомпьютера
Прочие свойства
- EAN
- 5904422325732
- Бренд
- PiHut
Описание
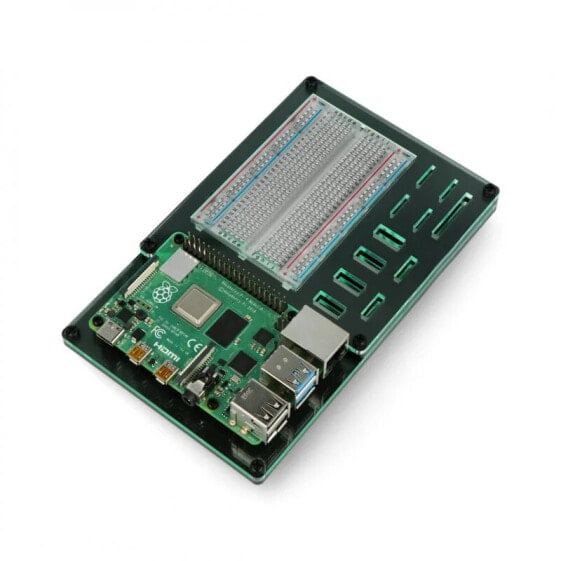
Product description: ProtoDock forRaspberry Pi3B/3B+/4B - acrylic - PiHut TPH-041.
The universaldocking stationmade of laser-cut acrylic helps keep your desktidyby keeping all the necessary accessories for theRaspberry Piin one place. ProtoDock makes working with the minicomputerfasterand moreorganized, thanks to a specially prepared contact plate space. The station can be successfully used as a stand for a ready-made design, allowing you to keep essential spare parts such as wireless USB modules for the wireless keyboard right next to the minicomputer. Product compatible withRaspberry Pi 3BandRaspberry Pi 4B.
Docking station with contact plate.
The kit does not include a Raspberry mini computer.
The kit includes
- 4-layer laser cut acrylic dock
- Contact plate 400 holes
- Necessary assembly elements
Installation instructions
- Remove the protective film from the housing components before installation.
- Place the transparent 162 x 100 mm panel on the black 162 x 100 mm panel so that all mounting holes fit together.
- Turn the whole thing by 180° and place the black nuts, then turn it again by 180° and screw the black distance to the placed nut(This is best done individually by holding the nut with your finger).
- Place the supplied contact plate in the cutout prepared for it.
- Apply a smaller black layer.
- Apply a smaller, transparent layer.
- Put 4x 17 mm screws into the other holes and in the place where only two layers of 2x 10 mm screws connect.
- Turn the whole thing 180° and then secure the bolts placed in point 7 with the cap nuts.
- Turn the whole thing 180°, placethe Raspberry Pion the prepared distances and fasten it using the supplied 7 mm long screws.
Order of the elements.
Useful links
- Manufacturer's website
- Installation instructions
