RGBWW LED strip SK6812 - digital, addressed - IP30 60 LED / m, 5V - 5m - white
- Артикул:
- 83791131


Характеристики
- Напряжение до
- 5.0 V
- Напряжение от
- 5.0 V
- светодиодный тип
- SK6812
- Класс герметичности
- IP30
- Светодиодно - цифровой
- yes
Общие характеристики
- Светодиодный - цветной
- RGBW
Прочие свойства
- Бренд
- BTF-LIGHTING
Технические характеристики
- Номинальная мощность
- 90 W
Эргономика
- Длина кабеля
- 5.0 m
Описание
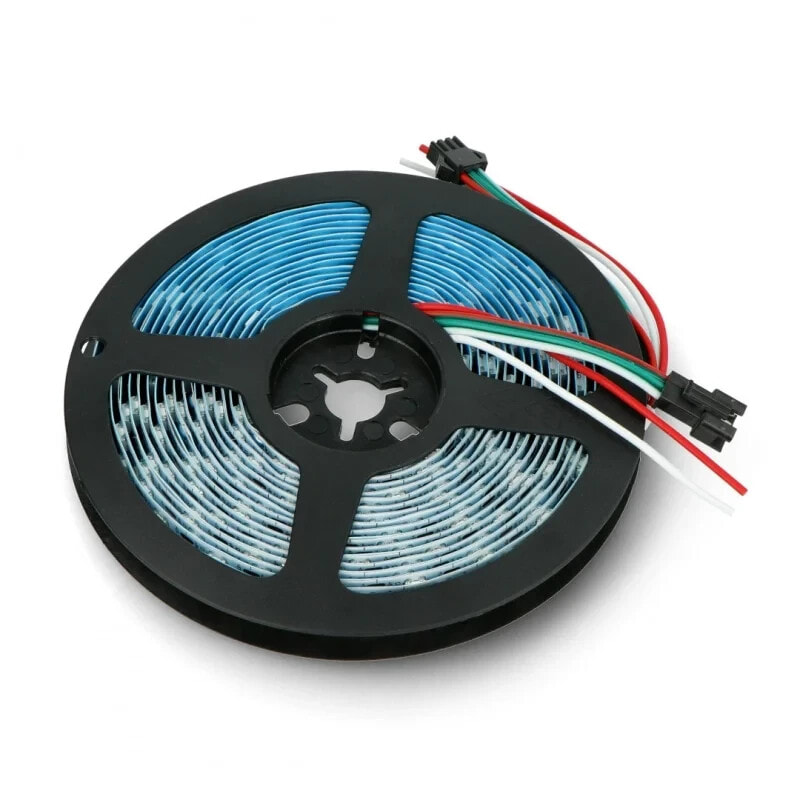
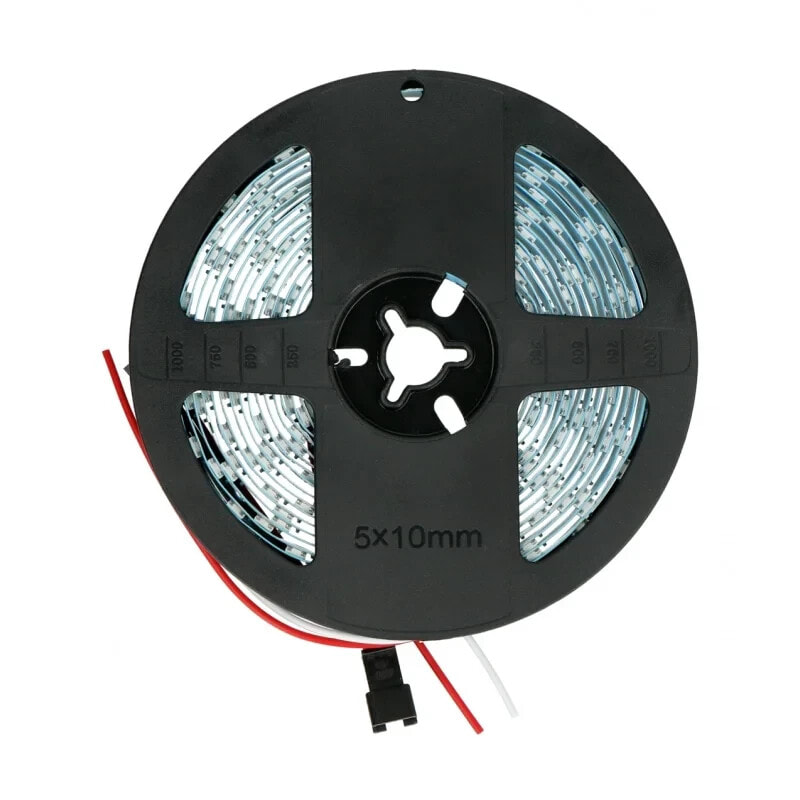
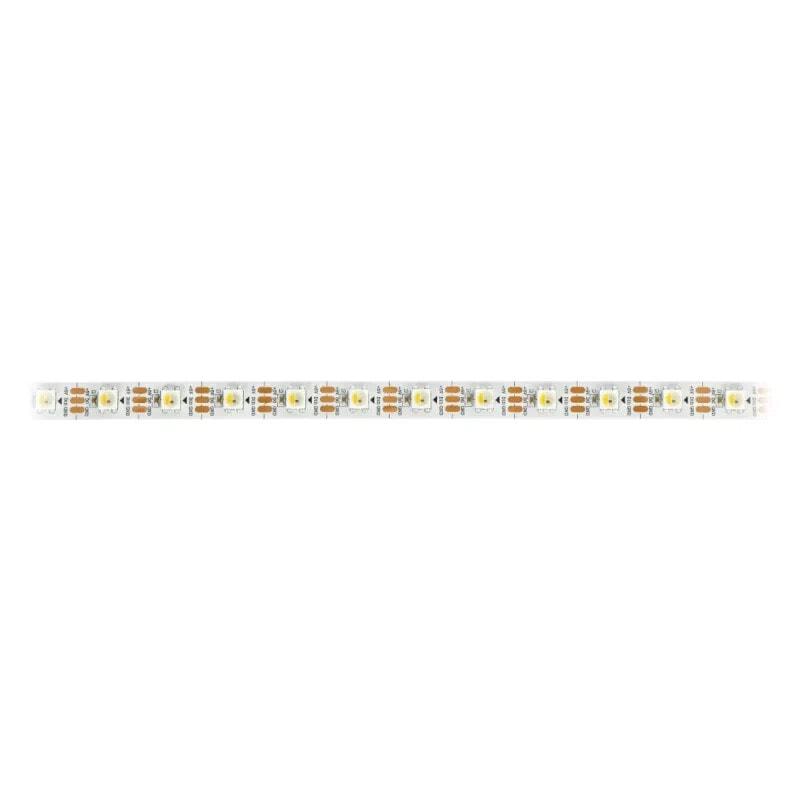
Digital RGBWW LED strip allowing for individual control of each diode. It was equipped with a chip SK6812. On one meter of the strip there are 60 LEDs. The diodes can be freely programmable, they adopt colours from a 24-bit colour palette. A voltage of 5 V is used to power the chain, and the power consumption is 18 W per meter of the strip. The control is done by a single microcontroller pin connected to the strip. The distance between the individual LEDs is about 17 mm.
The LED strip can be cut to any length. It should be shortened after each diode in the marked place.
LED strips can be connected together in series. The next string should be connected with the output connector. The 5 V, GND and DOUT leads of the DIN must be connected. When using 500 or more LEDs, the RAM available to theArduino UNOmay not be sufficient. In such a situation, use a controller with more RAM such asArduino MegaorRaspberry Piminicomputer. Connecting more LEDs is also associated with higher power consumption.
The strip has a 3-pin connector with the following leads:
- GND (white wire)- module ground.
- 5 V (red wire)- supply voltage, for one strip you should connect a source with current capacity of at least 1.8 A per meter.
- DAT (green wire)- digital control signal from the microcontroller.
Product compatible withArduinoandRaspberry Pi
- Arduino library on GitHubfor NeoPixel modules withconnection examples.
- Example of connectionwithRaspberry Pialong with code.
The density is 60 LEDs per meter of strip.
- Download the library fromGitHub by expanding the green Code button, then selectingDownload ZIP
- Unzip the downloaded ZIP file (you should see a folder containing the files: Adafruit_NeoPixel.cpp, Adafruit_NeoPixel.h and other subfolders)
- Rename the main folder to: Adafruit_NeoPixel
- Move this folder to Arduino libraries directory
- Restart your Arduino environment, the library will appear in Menu: File -> Examples
- Run the test program by selecting in the Arduino environment:
- File -> Examples -> Adafruit_Neopixel -> simple
- Select the pin from which the diodes will be controlled. By default it is pin 6:
- Line11#define PIN 6
- Select the number of pixels to be controlled. The default is 16:
- Line 14#define NUMPIXELS 16
- Upload the program to Arduino. The pixels should switch on one by one up to the number you specified in line 14.
- If you want to change the light color specify other values in the function:
- Line 40pixels.setPixelColor(i, pixels.Color(0,150,0))The RGB components are given in brackets, the maximum value of each component is 255
- Changing the lighting speed of individual pixels is possible by editing the values:
- Line 21int delayval = 500;
- Supply voltage: 5 V
- Power: 90 W
- Current consumption: 3.6 A/m
- Addressable pixel: 1 RGBWW diode
- Level of security: IP30
- PCB color: white
- Width: 10 mm
- Chain length: 5 m
The product is wound on a roll for easy transport and storage.
- Arduino library on GitHub
- Ambilight TV system for Raspberry Pi - Botland Blog
- Example of connecting to Raspberry Pi
- Adafruit user guide